eBox Platform: What it is and How to Use it
This article has been just updated:
![]() The eBox Platform is an open source framework built using the Ubuntu Linux distribution that is intended to centralize and manage all of the related services that comprise a network. We will take a look at what this software package has to offer, as well as investigate its development history and its rebranding as Zentyal server.
The eBox Platform is an open source framework built using the Ubuntu Linux distribution that is intended to centralize and manage all of the related services that comprise a network. We will take a look at what this software package has to offer, as well as investigate its development history and its rebranding as Zentyal server.
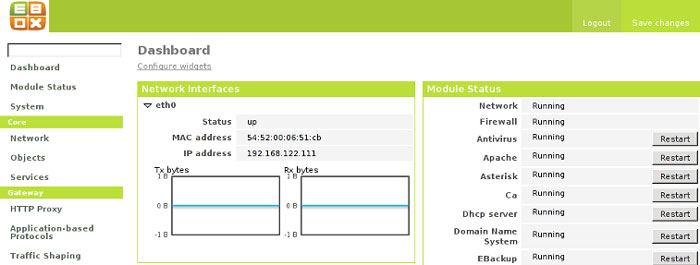
The eBox Platform is the brainchild of Spanish software developer and entrepreneur Ignacio Correas. It is based on the Ubuntu variant of the GNU/Linux operating system and provides users with a simple web interface from which to manage all of their machine’s services. The software also supplies a simplified development environment that can be used to add or modify features of the operating system.
 eBox Platform installer 1.4.2 is available at archiveos.org, which also gives an overview of its features. They include:
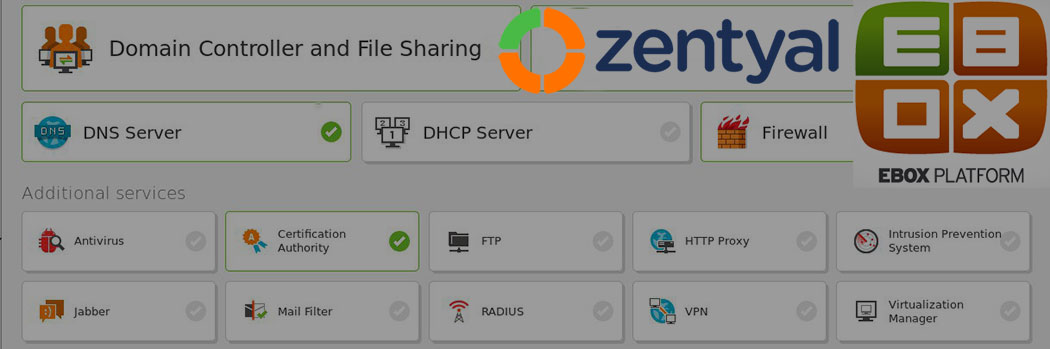
The eBox Platform is a modular system that enables the user to tailor their implementation by incorporating any subset of its components. The services and components are distributed via the Debian packaging system and include modules that can be used to implement features such as:
The flexibility afforded by the modular design of the eBox Platform makes it suitable for a wide variety of computing implementations. It is designed to ensure the viability and security of the platform while maintaining service availability and data integrity.
A detailed review of eBox by linux.com indicates that these are some of the ways that you can use this open source framework.
The ability to use the just the component you need for the functionality that you desire allows you to run lighter with less code overhead.
On August 19, 2010 notice was given confirming the renaming of the eBox Platform. Both the company responsible for developing the framework, eBox Technologies and the product itself were rebranded as Zentyal. The change took effect on September first of 2010 and was enacted to remove any confusion prospective users would have concerning the eBox name.![]()
eBox founder and current eBox Technologies CEO Ignacio Correas wanted the name change to eliminate the suggestion that the software comes integrated with hardware. The word “box” was to be removed and the product renamed to Zentyal to focus on the fact that the product is strictly server software and is not bound with any particular hardware.
Zentyal is a fusion of the words “Zen” and “Essential” that are meant to represent qualities such as insight and balance along with those that are fundamental and necessary when creating systems that rely on resilient network services. If you are interested in the latest version of what was once eBox, you need to look at the Zentyal server.
Zentyal Server is available as a free development edition as well as a commercial edition. Support is available with a commercial subscription, and you can try the commercial version with a free 45-day trial. You cannot, however, upgrade the development version to a commercial version. Here are the main differences between the editions.
We are now going to take a deeper look into some of the scenarios in which Zentyal can be used.
Using Zentyal to set up a network can be accomplished in two different ways that provide varying levels of functionality. The main difference in the two methods is the placement of the Zentyal server in relation to the other network components.
Using Zentyal in this manner allows you to use the full functionality of the framework. You place the Zentyal server between your router and your local network. This is the correct way to use a Zentyal server if you are in need of any of these functions: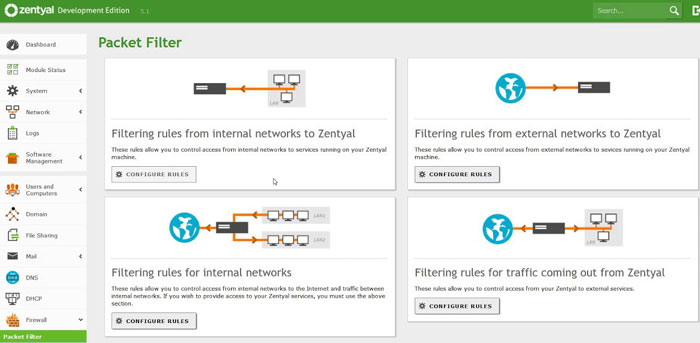
When you connect a Zentyal server to your local network as you would any other machine it limits the services that are available to you. Using Zentyal in this way restricts its use to servers providing these specific functions: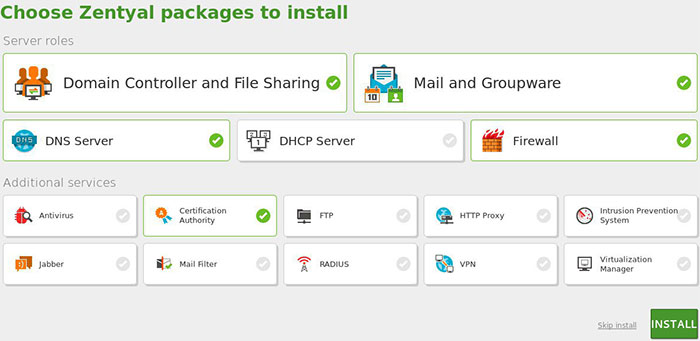
Small businesses that are looking to stretch their IT budget may want to look into using Zentyal to replace their Microsoft Small Business Server. It can replace all of the functions of the Microsoft product including:
Zentyal can be administered through a graphical interface as well as a web browser, allowing you to manage it from anywhere on your network. The software can be run on less powerful hardware than other alternatives. One drawback to testing the software is the inability to run it as a live CD, requiring you to perform a full install.
eBox’s maturity and transformation into Zentyal server is an example of the possibilities inherent in the open source movement. Zentyal survives as a company by providing paid support for their software, which can freely be used in many different scenarios to implement network services for your installation.